










Quick Answer
Dig the hole, position the post, mix and pour your concrete, check plumb, then leave it to cure before loading the wall.
- Hole: roughly a third of the post's length in depth, 250–350mm diameter.
- Concrete: rapid set for same-day loading, post mix or footing concrete for standard multi-day cure.
- Cure: ~1 hour for rapid set, 48–72 hours for standard mixes, before backfilling or fixing panels.
See the full rapid set concrete range before you start.

Setting a post in concrete is straightforward once you've done it a few times, but it's also easy to get one small step wrong — an unbraced post, a mix that's too wet, or backfilling too early — and end up with a lean that shows up months later. This guide walks through the process from digging the hole to the point where the wall can safely take load, whether you're replacing a single post or setting a full run for a new retaining wall.
Tools and Materials
Have everything on hand before you start, particularly if you're using a fast-curing product — stopping partway through to find a missing tool wastes precious working time.

- Post hole digger or auger — hand tool for a few posts, powered auger for a longer run.
- Steel post — sized and rated for your wall height and post spacing.
- Concrete — rapid set concrete, post mix, or footing concrete, depending on your timeframe.
- Spirit level — long enough to check plumb on two faces of the post.
- Mixing tub, wheelbarrow, or bucket — for on-site mixing.
- Bracing timber or stakes — to hold the post plumb while concrete cures, especially with standard-cure products.
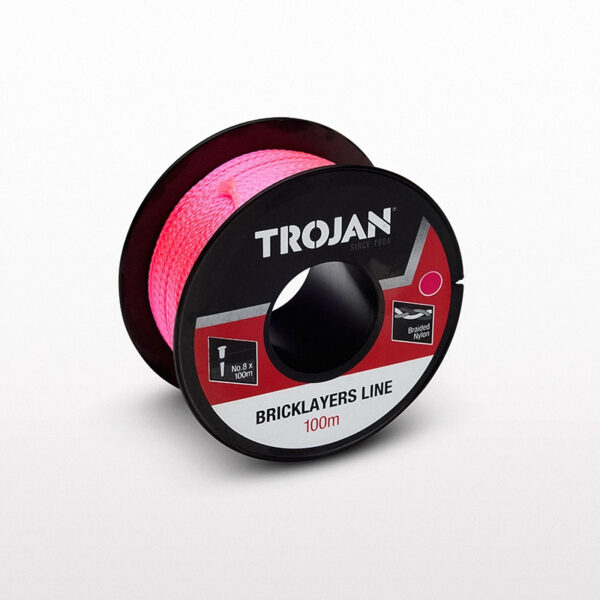
- Tape measure and string line — to keep post spacing and height consistent along the wall.
- Gloves and eye protection — wet concrete is caustic and irritates skin and eyes on contact.
- Clean water — measured per the bag's instructions rather than added by eye.
If you're setting steel posts as part of a full retaining wall, our steel retaining wall posts range and concrete can be ordered together.
Choosing your concrete before you start
Decide on rapid set versus a standard-cure product before you're standing at the hole with a post in hand — it changes how you approach the rest of the job. Rapid set means having the post positioned and braced before you mix, since the working time is short. A standard mix like post mix or footing concrete gives you more room to adjust the post after pouring, but means planning for 48–72 hours of bracing and dead time before you can continue the build. If you haven't settled on which product suits your job, our comparison guide covers the trade-offs in more detail.
Safety basics
Wet concrete is alkaline and can cause skin irritation or chemical burns with prolonged contact, so gloves aren't optional if you're hand-mixing or pouring. Eye protection matters too, particularly when mixing dry bagged product in any wind. If you're digging near a boundary, driveway, or path, mark out the work area so nobody walks into an open hole, and keep bystanders — including pets and kids — clear of the mixing area until you've finished pouring.
Digging and Preparing the Hole
- Mark post positions. Use a string line and tape measure to set consistent spacing along the wall before digging anything.
- Dig to the right diameter. Aim for roughly 250–350mm diameter, depending on post size — wider for larger posts or looser soil.
- Dig to the right depth. As a general rule of thumb, aim for around a third of the post's total length below ground. For a full breakdown of embedment depth by wall height and soil type, see our post embedment guide.
- Clean out loose material. Remove loose soil, roots, or debris from the base of the hole so the concrete sits on firm ground, not loose fill.
- Check for services. Confirm there's no buried cabling or piping in the dig zone before you start — a quick check that's far cheaper than an accidental strike.

Take a moment here to compare your hole size against how much concrete you've ordered. Our quantity guide covers how to work out bag counts by hole size, so you're not caught short mid-pour.
Adjusting for soil type
Not every hole comes out the same, even with identical dimensions on paper — soil type and site conditions shift how much concrete a footing effectively needs to hold firm:
- Firm clay generally holds a clean-sided hole and gives good grip once the concrete cures around it.
- Sandy or loose soil often needs a slightly wider hole, since the sides can crumble as you dig and the looser ground provides less natural resistance around the footing.
- Rocky ground can slow digging significantly and may produce an irregular hole shape — take the extra time to clean out loose rock fragments from the base rather than pouring concrete over unstable fill.
- Wet or waterlogged ground is worth avoiding if possible; if you must dig in wet conditions, allow for extra drainage or bail out standing water before pouring, since a waterlogged hole dilutes the mix as it goes in.
A note on hole shape
A slightly wider base than top — sometimes called a bell shape — can add extra holding strength, since the concrete collar has more resistance to being pulled straight up or tilted. This isn't essential for most residential jobs, but it's a useful technique on sites with looser soil where you want extra grip without digging a wider hole all the way down.
Mixing Rapid Set or Post Mix
The mixing process differs slightly depending on which product you're using:
Mixing rapid set concrete
- Position and lightly brace the post before you open the bag — rapid set's working window is short, typically 10–20 minutes.
- Mix only as much as you can pour before it starts to go off — don't pre-mix extra for the next post.
- Follow the bag's water ratio closely; rapid set is more sensitive to excess water than standard mixes.
- Pour immediately once mixed, filling around the post evenly.
Mixing post mix or footing concrete
- Mix to a thick, workable consistency — firm enough to hold its shape on a shovel, not sloppy.
- Mix in a tub or wheelbarrow if you're doing several posts, keeping the ratio consistent batch to batch.
- Pour in stages for a deep hole, tamping lightly between pours to remove air pockets.
Whichever product you're using, avoid adding extra water to make mixing easier — it weakens the cured strength and is one of the most common reasons a footing underperforms its rated strength.
Getting the consistency right
A good rule of thumb for hand-mixed concrete: it should hold its shape on a shovel without slumping flat, but still be workable enough to pour and settle around the post without excessive tamping. Too dry, and it won't fill gaps around the post properly, leaving voids that weaken the footing. Too wet, and the water dilutes the cement paste, reducing the concrete's final strength once cured. Follow the water quantity printed on the bag as your starting point, adding small amounts gradually rather than guessing a ratio from scratch and hoping it comes out right.
If you're mixing multiple bags for one large hole, mix and pour each batch in reasonably quick succession rather than letting the first batch begin to set before the second goes in — this helps the footing cure as a single, well-bonded mass rather than layered batches with weaker seams between them that could become a failure point down the track.
Setting the Post Plumb
- Position the post centrally in the hole before pouring, or lower it into the wet concrete immediately after pouring, depending on your preferred method.
- Check plumb on two faces with a spirit level — front-to-back and side-to-side — not just one, since a post can look straight from one angle and be leaning from another.
- Brace the post with timber stakes at two angles, particularly important with standard-cure post mix or footing concrete given the longer cure time.
- Re-check plumb a few minutes after pouring, since the post can shift slightly as the concrete settles around it.
- Check height and alignment against your string line, so the post lines up with the rest of the run before the concrete sets.
- Leave it undisturbed. Resist the urge to nudge the post once the concrete has started to firm up — adjusting it after the set has begun can crack the bond between post and concrete.

With rapid set, this whole sequence needs to happen quickly, since you've only got a short window before the mix goes off. With post mix or footing concrete, you have more time to fine-tune plumb and alignment before the bracing needs to go in.
Working with a helper vs solo
Setting a post plumb is noticeably easier with a second person — one holding the level and post steady while the other pours and tamps the concrete. If you're working solo, it's worth pre-cutting your bracing timber and having it within easy reach before you start pouring, so you're not scrambling to find a stake while trying to hold a post upright with one hand. A simple approach for solo work is to brace the post loosely before pouring, pour and settle the concrete, then do the final plumb adjustment and tighten the bracing while the mix is still workable.
Checking alignment along a full run
If you're setting several posts for one wall, a string line pulled taut between the first and last post positions is the easiest way to keep every post in the run aligned. Check each new post against the string line as you go, rather than only checking it against its immediate neighbour — small errors between adjacent posts can compound into a noticeably curved or wandering line by the end of a long run if you're not checking against a fixed reference.
Cure Time Before Loading
Don't backfill, fix panels, or apply any load to the post until the footing has cured enough to bear it:
- Rapid set: typically load-bearing within about an hour. Give it a bit longer in cold or wet weather.
- Post mix or footing concrete: allow a minimum of 48 hours, ideally 72, before loading.
Weather affects cure time on both. Cold temperatures — particularly below around 5°C — slow the curing reaction and can extend the wait well beyond the usual window. Hot, dry weather can dry the surface faster than it cures underneath, so keeping the surface lightly damp for the first day helps it cure evenly rather than cracking at the surface.
Rain shortly after pouring is usually less of a concern than temperature extremes, since the concrete has already begun to set within the first hour or so. Heavy rain in that early window, though, can wash cement paste off an exposed surface before it's had a chance to firm up — a simple cover over the footing is cheap insurance if rain is forecast right after your pour. Wind isn't usually a major factor for cure time itself, but it can dry an exposed surface faster than expected in hot conditions, which is another reason to keep the surface damp if you're pouring on a hot, windy day.
For the full comparison of cure times and when to use each product, see Rapid Set vs Post Mix vs Standard Concrete.
Common Mistakes
- Backfilling too early. The footing can look solid on the surface well before it's cured through — stick to the recommended wait time, not how it looks.
- Mixing too wet. Extra water makes the mix easier to pour but reduces the cured strength — follow the bag's ratio.
- Skipping the second plumb check. A post that's plumb the moment you pour can shift slightly as the concrete settles — recheck a few minutes later.
- Under-sizing the hole. Saving a bag of concrete isn't worth the risk of an undersized footing failing early under load.
- Removing bracing too soon. Even if the surface looks set, leave bracing in place for the full recommended cure time on standard-cure products.
- Not checking for services before digging. A preventable and costly mistake if skipped.
- Ignoring soil type. Loose or sandy soil may need a wider hole than the standard guide suggests to achieve the same holding strength as firmer ground.

Most of these mistakes trace back to rushing one of the earlier steps — an unbraced post, a mix that's too wet, or loading the footing before it's cured. Taking the extra few minutes at each stage is what separates a post that stays plumb for decades from one that needs redoing within a year or two.
A simple post-pour checklist
Once you've poured and checked plumb, a quick checklist before you walk away from each post helps catch problems while they're still easy to fix:
- Is the post plumb on both faces, not just one?
- Is the bracing secure and unlikely to shift overnight, especially if wind or rain is forecast?
- Is the top of the footing sloped slightly away from the post to shed water, rather than flat or dished toward it?
- Have you noted the pour date somewhere, so you know exactly when the cure window ends and it's safe to backfill or continue the build?
- Is the area around the post clearly marked or barriered if it's near foot traffic, until the concrete has cured?
Keeping a simple record of pour dates is especially useful on a multi-day build where different posts were set on different days — it stops you accidentally loading an earlier post before its cure window is actually up, particularly with standard-cure products where the visual difference between "looks set" and "actually cured" isn't obvious to the eye.
When to call a professional
This guide covers a standard residential post-setting job. If your wall is taller, on a steep or unstable site, or requires council approval, it's worth having the footing specification checked by an engineer or experienced tradesperson before you dig — the standard rules of thumb in this guide are a starting point for typical jobs, not a substitute for site-specific engineering advice on larger or more complex walls.
After the concrete has cured
Once the recommended cure time has passed and the footing is safely load-bearing, you can move on to the next stage of the build — backfilling around the post, fixing sleepers or panels, or continuing along to the next post in the run. It's still worth a final visual check of each footing before loading it: look for any obvious cracking, gaps between the post and the concrete collar, or signs the post has shifted since you last checked it. Catching an issue at this stage, before the wall is fully built and loaded, is far easier to fix than discovering a lean months later once the whole structure depends on that footing to hold its position.
Leave a comment (all fields required)