











Quick Answer
To install woodgrain concrete sleepers, first confirm the wall design and approvals, locate services, set out the exact post centres, install the specified steel posts and footings, allow the footing concrete to reach the required strength, then place the sleepers from the lowest course upward while building the drainage zone behind them. The timber-look finish does not change the structural process. Sleeper size, post profile, embedment, footing size, drainage and lifting method must come from the selected wall system or project design rather than a universal height or depth rule.
This guide explains how to install woodgrain concrete sleepers safely and in the correct order. It is suitable for planning a straightforward residential project or checking a contractor’s scope, but it does not replace engineering, council requirements, utility information or the manufacturer’s installation details.

Materials You'll Need
Before starting, gather the full materials list, running short partway through a build is one of the most common and avoidable delays.
- Woodgrain concrete sleepers , sized and strength-graded for your wall height and soil type
- Galvanised steel posts, spaced according to your engineering spec
- Concrete for post footings
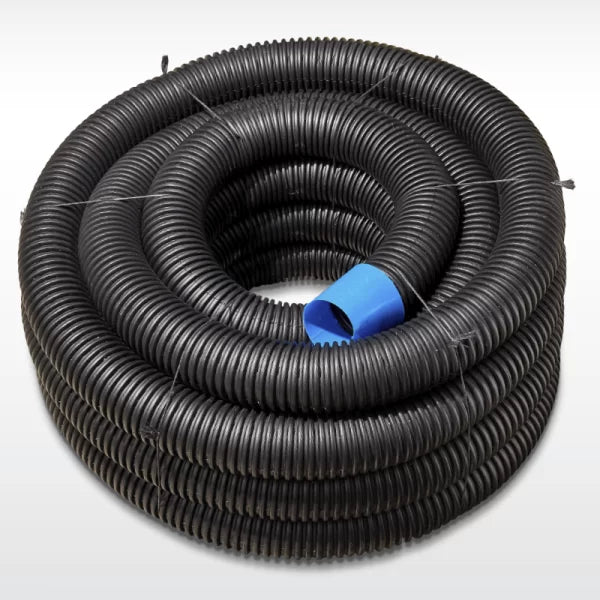
- Ag pipe, geotextile fabric and free-draining gravel for drainage
- String line, pegs, spirit level, tape measure and a post-hole auger or shovel
Tools Worth Having on Hand
Beyond the core materials, plan the tools and plant needed for the actual product weights and site. A string line, pegs, tape, laser or spirit level, post-hole equipment, bracing, concrete tools and drainage tools are typical. Concrete sleepers are heavy precast units, so confirm the listed unit weight and use a crew, lifting clamps, excavator or other rated lifting method suited to the load. Do not rely on improvised hooks, damaged slings or manual lifting that exceeds the team’s capacity. Avoid planning to cut reinforced concrete sleepers unless the supplier and wall design permit it; cutting can affect reinforcement cover, fit and structural performance and creates respirable crystalline silica dust that requires controlled methods and suitable PPE.
A Practical Materials Checklist
It helps to physically tick off materials against your calculated quantities before digging starts, rather than discovering a shortfall once posts are already in the ground. Confirm sleeper count (including a wastage margin), post count matched to your spacing plan, sufficient footing concrete for the number and depth of post holes, and enough drainage materials, ag pipe, geotextile fabric and gravel, to run the full length and height of the wall's drainage zone. A short delay at this stage to double-check quantities is far less disruptive than a delay mid-build waiting on a top-up delivery. It's also worth confirming delivery timing against your planned start date, particularly for larger orders, so materials are on-site and ready when you need them rather than causing a hold-up on day one.
Confirming Your Spec Before You Dig
Before any digging starts, confirm the exact sleeper product, face height, thickness, length, reinforcement, compatible post channel and designed post centres. Record the maximum retained height, wall steps, corners, soil conditions, drainage outlet and any surcharge from a driveway, fence, building, pool or sloping ground. Council approval and engineering triggers vary by jurisdiction and site, so check the local requirements before ordering or excavating rather than relying on one national height threshold.
Checking for Underground Services First
Before digging any post holes, lodge a free enquiry with Before You Dig Australia and follow every asset owner’s response. Plans show the approximate location of registered infrastructure and do not remove the duty to use safe locating and excavation methods. Private services, irrigation, drainage and assets owned by organisations outside the service may still be present, so engage a skilled locator where plans or site conditions are unclear.
Installing the Posts
Posts are the structural backbone of the wall, and getting them right is the single most important part of the build.
Setting Out the Wall Line
Start with a string line along the intended wall face to mark a straight, accurate reference line. Mark post positions along this line at your required spacing, checking for square corners using the 3-4-5 triangle method if the wall has any returns or corners.
Digging and Setting Posts
Dig post holes to the depth, diameter and founding level shown in the approved wall system or engineering design. Do not use a blanket one-third rule as the final footing specification. Required embedment changes with post section, retained height, post spacing, soil strength, groundwater, slope and surcharge. Remove loose material from the holes, keep water under control and have any soft, filled or collapsing ground assessed before concrete is placed. Set posts plumb and braced, then use the specified concrete and loading time. “Twenty-four hours” is not a universal cure period; follow the concrete supplier’s instructions and the project specification before applying sleeper loads.
Getting Post Spacing Consistent
Consistent post spacing matters more than it might seem, since sleepers need to seat correctly into each post along the full wall run. Measure and mark all post positions along the string line before digging any holes, rather than digging one hole and then pacing out the next by eye, small spacing errors compound over a long wall run and can leave a final post position awkwardly close to or far from where a sleeper joint actually needs to land. This is a five-minute planning step that prevents a genuinely frustrating problem discovered only once you're several posts into the dig.
Choosing 100 Series or Heavier
The 100 Series steel post collection includes options used in selected residential systems. The series name alone does not prove suitability for a particular wall. Confirm the exact UC, PFC, corner or joiner section, post length, galvanising, channel fit and designed spacing against the selected sleepers and site loads. Heavier series or a different structural system may be required by the design.
Checking Plumb in Both Directions
It's easy to check a post is plumb when looking at it face-on but forget to check the other axis. Use a spirit level against both faces of the post, parallel to the wall line and perpendicular to it, before the concrete sets, since a post that's plumb in one direction but leaning in the other will throw the whole wall face out of alignment in a way that's much harder to correct once the footing has cured.
Common mistake: starting to place sleepers before post concrete has fully cured. Posts that shift under load before the concrete has set can throw the whole wall out of alignment. Give footings the full cure time recommended for the concrete product you're using before applying any load to the posts.
Getting Drainage Right
Drainage must be designed as part of the wall, not added after the sleepers are stacked. The exact pipe, aggregate width, filter fabric, weep-hole arrangement and legal outlet depend on the site and approved details. The retaining wall drainage guide explains the components and common failure points, but local stormwater requirements and the project design still control the final layout.

The Basic Drainage Sequence
- Lay geotextile fabric against the excavated soil face, behind where the sleepers will sit
- Install slotted ag pipe along the base of the drainage zone, with fall toward a discharge point
- Backfill with free-draining gravel between the fabric and the sleeper face as the wall goes up
- Wrap the fabric over the top of the gravel layer to stop soil migrating in from above
Why Fall and Discharge Point Matter
Ag pipe only works when it has a continuous, verified path to a lawful discharge point. Do not assume that daylighting water onto a neighbour, footpath or unstable slope is acceptable. Confirm the outlet before excavation, maintain the specified fall, prevent low points and test the completed route before the drainage zone is covered. Where stormwater capacity, easements or high flows are involved, obtain appropriate hydraulic or council advice.
Why Drainage Can't Be an Afterthought
Drainage needs to go in as the wall is built, layer by layer, alongside the sleepers, not added afterwards. Trying to retrofit drainage behind a completed wall is difficult and often impractical, which is exactly why it needs to be planned and installed as part of the sequence, not treated as a final step once the sleepers are in.
Choosing the Right Backfill Gravel
Not all gravel is suitable for drainage backfill. Free-draining aggregate with minimal fine particles allows water to move freely down to the ag pipe; a gravel with too much fine material can behave more like the surrounding soil and defeat the purpose of the drainage layer. If you're unsure what to specify, ask your supplier for a drainage-grade aggregate specifically, rather than assuming any gravel product will do the job equally well.
Placing and Finishing the Sleepers
With posts set and drainage underway, the sleepers themselves go in relatively quickly.

- Starting from one end, slide the first course of sleepers into the post channels, checking each is level before moving on
- Continue course by course, adding drainage gravel behind each course as you go rather than leaving it until the end
- Check the wall face periodically with a spirit level and string line to catch any drift early, rather than after several courses are in
- Cut sleepers to length at corners or wall ends as needed, keeping cuts clean and square
A Note on Handling Woodgrain Sleepers
Handle woodgrain sleepers as heavy precast concrete units. Check each product’s weight and lifting points before delivery, keep people clear of suspended loads and use rated equipment operated by competent people. Protect the finished face with suitable dunnage and do not drag units over hard surfaces or strike them with steel bars. Quarantine sleepers with major cracks, exposed reinforcement, severe chips or transport damage and obtain supplier advice before installation.
Working Bottom to Top, Course by Course
Sleepers should always go in from the bottom course upward, never skipping ahead to place a higher course before the one below it is properly seated and level. Each course relies on the one beneath it being correctly positioned, and working out of sequence makes it much harder to catch and correct small levelling errors before they compound up the wall face.
Protecting the Woodgrain Finish During the Build
While the textured finish is durable once cured and installed, it's worth taking basic care during handling and construction, avoiding scraping sleepers against each other unnecessarily, and keeping equipment like shovels or bars away from direct contact with the finished face where practical. Minor handling marks are rarely visible once a wall is complete and weathered slightly, but a bit of care during the build keeps the finish looking its best from day one.
The Full Build Process, Start to Finish
For a broader construction overview, the concrete sleeper retaining wall build guide covers planning, materials, posts, drainage and backfill. Use it together with the exact product drawings and site-specific design. A woodgrain surface is aesthetic, but individual timber-look products can differ in size, weight and compatible post system.
When to Call In a Professional
DIY installation may be practical only where the wall design, approvals, ground, access, lifting method and drainage are all straightforward and the builder is competent to complete the work safely. Stop and obtain professional help for uncertain soil, groundwater, reactive clay, nearby structures, boundary issues, surcharge, difficult lifting, services, significant wall height or any departure from the supplier’s standard system. The consequences of incorrect post set-out or inadequate drainage are usually much greater than the labour saving.
Realistic Timeframes for a DIY Build
Plan the work in stages rather than promising a one-weekend build. Service locating, excavation, inspection of founding ground, post bracing, footing placement, curing, lifting, drainage, controlled backfill and final testing all take time. Build the schedule around the specified concrete loading time and equipment availability. Do not rush sleepers onto posts simply because the wall needs to be finished before the next delivery or forecast change.
Weather and Timing Considerations
Weather affects excavation, concrete placement, lifting and drainage. Saturated holes can collapse or soften founding ground, while hot, cold or windy conditions can change concrete handling and curing requirements. Follow the concrete product instructions, protect fresh work and reassess the site after heavy rain. Do not backfill against footings or posts that have not reached the required strength.
How to Install Woodgrain Concrete Sleepers: Sequence at a Glance
| Stage | Main check before continuing |
|---|---|
| 1. Design and approvals | Wall geometry, loads, drainage outlet, council pathway and compatible system confirmed |
| 2. Services and access | Utility information received, private services considered and lifting route prepared |
| 3. Set-out | Wall face, corners, steps and post centres match the drawings and sleeper lengths |
| 4. Posts and footings | Correct sections, embedment, hole dimensions, plumb, bracing and concrete loading time |
| 5. Sleepers and drainage | Lowest course level, channel fit, lawful outlet, fabric and clean drainage aggregate installed together |
| 6. Backfill and finish | Backfill type and compaction follow the design, drainage is tested and wall alignment is recorded |
Planning Delivery and Safe Lifting
Concrete sleepers often arrive on a crane truck, but the delivery reach may stop at the driveway or front boundary. Measure the full route to the wall and confirm whether the delivery vehicle can enter, turn, stabilise and unload without contacting powerlines, trees, roofs, fences or soft ground. Tell the supplier about steep access, overhead restrictions, narrow streets and any need for a smaller vehicle before dispatch.
Prepare level dunnage so sleepers can be stored off the ground without twisting or damaging the textured faces. Keep the stack stable and away from excavations. Do not leave sleepers where the lifting machine has to travel over unfinished footings or where workers must stand between a suspended sleeper and a post.
The installation method should be selected from the heaviest and longest unit, not the average sleeper. Confirm the capacity of lifting attachments and machinery at the required reach. A machine’s rated capacity can reduce as the boom extends, so a unit that is easy to lift beside the machine may not be safe at the far side of a wall.
Placing the First Course Correctly
The first course controls the line and level of every course above it. Prepare the base exactly as shown in the wall detail, then check the bearing beneath each sleeper. Do not bridge soft pockets, loose spoil or projecting concrete with packers unless the approved system provides a specific levelling method.
Set the first sleeper into both channels without forcing it. Confirm that the finished face is oriented correctly, the ends have adequate engagement and the sleeper is level along its length. Check the post faces again because a post can appear plumb while the channel is slightly rotated relative to the wall line.
Work from a fixed datum instead of repeatedly measuring from uneven ground. Where the wall steps, mark every step level before sleepers are placed and confirm how the drainage pipe continues through or around the transition.
Backfilling Without Pushing the Wall Out of Line
Install drainage aggregate and the specified backfill progressively and evenly. Do not tip a large load against one short section of wall or operate heavy compaction equipment closer than the design allows. Uneven backfill can create temporary loads that were not considered in a simple final-wall check.
Use the backfill material and layer thickness nominated in the design. Clay excavated from the footing holes is not automatically suitable behind the wall, and clean drainage aggregate should not be replaced with mixed spoil. Keep geotextile in position so soil does not migrate into the drainage zone.
Recheck plumb, sleeper seating and drainage as the level rises. It is much easier to correct a blocked outlet, folded fabric or displaced pipe while the drainage zone is open than after the final surface has been landscaped.
Cutting, Drilling and Protecting the Finish
Avoid cutting or drilling reinforced sleepers unless the manufacturer and project design expressly allow it. A cut can intersect reinforcement, reduce concrete cover or create an end that no longer engages correctly in the post channel. Where a wall length does not suit whole units, revise the bay set-out or order a compatible shorter product before defaulting to site cutting.
Concrete products can generate respirable crystalline silica dust when cut, ground or drilled. Any permitted work needs an appropriate controlled method, suitable equipment, exclusion of bystanders and respiratory protection selected for the task. Dry cutting with an ordinary circular saw should not be presented as a routine DIY step.
Clean mortar, soil and concrete splashes from the visible face using the supplier’s recommended method. Do not use aggressive acids, wire wheels or coatings that have not been tested on the finish. If a colour sealer or repair product is proposed, test it on an offcut or hidden area first.
Final Checks Before Handover
- Confirm the wall line, levels, post plumb and sleeper seating against the drawings.
- Check that every drainage outlet is visible, lawful, unobstructed and tested.
- Record buried services, drains and wall components before landscaping hides them.
- Remove lifting debris, concrete overspill and loose aggregate from post channels and outlets.
- Keep heavy vehicles, stockpiles and new structures away from the retained side unless included in the design.
- Provide the owner with product information, drawings, approvals and inspection guidance.
Inspect the wall after major rain and during the first seasons of service. New leaning, bowing, settlement, erosion, blocked outlets, cracking or water emerging from an unexpected location should be investigated early. A concrete sleeper wall still needs drainage and site maintenance even though the woodgrain face does not require timber staining or treatment.
Common Installation Mistakes
Ordering before the post layout is final. Sleeper length and post centres must work together. Small set-out errors can leave a final bay that no standard sleeper fits.
Using a universal embedment rule. Post depth and footing size must reflect the actual wall, post section, soil and loads.
Loading green footings. The posts can move before the concrete reaches the required strength. Follow the specified loading time rather than a fixed calendar shortcut.
Forcing an incompatible sleeper into a channel. Grinding concrete, spreading steel or using loose packing changes the intended connection and should not replace a matched system.
Building the wall before the outlet is solved. Ag pipe without a lawful, functioning discharge point does not complete the drainage system.
Backfilling too quickly or unevenly. Large one-sided loads can move sleepers or posts before the wall is ready.
Cutting reinforced sleepers as a normal adjustment. Confirm a designed solution and control silica exposure rather than improvising on site.
Before ordering, match the exact woodgrain sleeper product to its steel posts, technical drawings and wall design. Use the collection and build guides above to prepare a complete quantity list, then request a delivered quote that includes sleepers, posts, drainage and handling requirements.
FAQs
Does the woodgrain finish change the installation method?
No. The finish is aesthetic. The installation still depends on the exact sleeper dimensions, reinforcement, compatible posts, footing design, drainage and lifting method.
How deep should retaining wall posts be embedded?
There is no universal depth that is safe for every wall. Use the approved system or engineering design, which should account for the post section, wall height, spacing, soil, groundwater, slope and surcharge.
Can I install woodgrain concrete sleepers myself?
Only when the design, approvals, access, lifting, services, drainage and ground conditions are straightforward and you have the skills and equipment to complete the work safely. Obtain professional help for uncertain or demanding sites.
How long should the post concrete cure before sleepers are installed?
Follow the concrete supplier’s loading instructions and the project specification. A fixed 24-hour rule is not suitable for every concrete mix, footing size or weather condition.
Can woodgrain concrete sleepers be cut to length?
Do not cut reinforced sleepers unless the supplier and design permit it. Cutting can affect reinforcement, concrete cover and channel engagement and can create hazardous silica dust.
Do all retaining walls need drainage?
The drainage arrangement must suit the wall and site. Structural retaining walls generally need a controlled drainage path, clean aggregate, filter fabric and a lawful outlet as shown in the design.
Should I use 100 Series posts?
Use the exact post section and length specified for the chosen sleeper system and site. A series label alone does not prove suitability.
What should I inspect after installation?
Check the wall line, sleeper seating, post movement, drainage outlets, erosion, cracking and unexpected water after major rain. Investigate changes early.
Leave a comment (all fields required)